Blog

×××
Tinkernut Blog
  • New Video Sneak Peak!


    [vc_row][vc_column width=”2/3″][vc_separator][venera_framed_image content_type=”image” css_animation=”appear” frame_type=”picture” slider_engine=”flexslider” video_link=”https://www.youtube.com/watch?v=ihwQBJGNSV0″ browser_url=”https://www.youtube.com/watch?v=ihwQBJGNSV0″ images=”6409″][vc_separator][/vc_column][vc_column width=”1/3″][/vc_column][/vc_row][vc_row][vc_column width=”2/3″][vc_tabs][vc_tab title=”Update” tab_id=”1402713028-1-398858-18b3f3d7-2573″][vc_column_text]

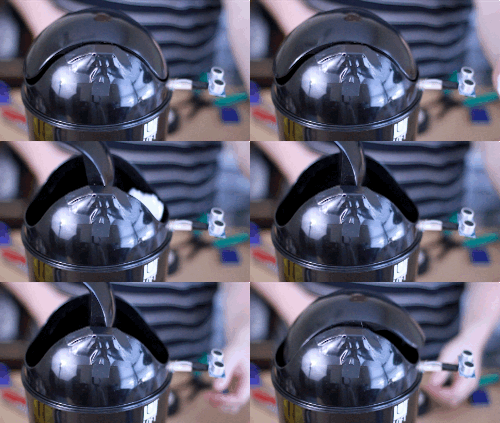
    My next tutorial is going to be about Ultrasound and controlling things and sending data using ultrasonic waves. I’ll be creating several things, but this quick clip is one of the projects I’ll be making…an ultrasonic trashcan 🙂

    [/vc_column_text][/vc_tab][vc_tab title=”Important Links” tab_id=”1402713403419-2-18858-18b3f3d7-2573″][vc_column_text]

    [/vc_column_text][/vc_tab][/vc_tabs][/vc_column][vc_column width=”1/3″][/vc_column][/vc_row]
  • Will It Microwave?


    [vc_row][vc_column width=”2/3″][vc_separator][venera_framed_image content_type=”video” css_animation=”appear” frame_type=”browser” slider_engine=”flexslider” video_link=”https://www.youtube.com/watch?v=WIMhraVcdTg” browser_url=”https://www.youtube.com/watch?v=WIMhraVcdTg”][vc_separator][/vc_column][vc_column width=”1/3″][/vc_column][/vc_row][vc_row][vc_column width=”2/3″][vc_tabs][vc_tab title=”About This Project” tab_id=”1402713028-1-39afe7-cbb103e5-43f2″][vc_column_text]

    Why don’t microwaves and metal get along? What makes microwaves destroy electronics? Let’s dive deep into the world of electromagnetic radiation to find out!


    Help support my channel by becoming a patron!   Get social!

    [/vc_column_text][/vc_tab][vc_tab title=”Parts List” tab_id=”1402713028-2-39afe7-cbb103e5-43f2″][vc_column_text]


    Here’s what you will need for each project:


    Radio Wave Project

    • A nickel (or any other coin)
    • A 9v battery
    • An AM radio

    Small EMP generator

    • A disposable camera
    • A cheap calculator
    • Extra wire
    • A high voltage switch
    • Soldering equipment

    [/vc_column_text][/vc_tab][vc_tab title=”Further Learning” tab_id=”1402713403419-2-1afe7-cbb103e5-43f2″][vc_column_text]

    Learn more about electromagnetic radiation!

    [/vc_column_text][/vc_tab][/vc_tabs][/vc_column][vc_column width=”1/3″][/vc_column][/vc_row]
  • World’s cheapest speaker!


    [vc_row][vc_column width=”2/3″][vc_separator][venera_framed_image content_type=”video” css_animation=”appear” frame_type=”browser” slider_engine=”flexslider” video_link=”https://www.youtube.com/watch?v=WTWe3OcD7u4″ browser_url=”https://www.youtube.com/watch?v=WTWe3OcD7u4″][vc_separator][/vc_column][vc_column width=”1/3″][/vc_column][/vc_row][vc_row][vc_column width=”2/3″][vc_tabs][vc_tab title=”About This Project” tab_id=”1402713028-1-39afe7-cbb1″][vc_column_text]

    What do you need to make the simplest form of a speaker? Surprisingly, you probably already have everything you need! Click on the “Parts list” tab to see what you need to make both bone conducting headphones and your own speaker! Then, if you still want more, click on the “Further Learning” tab to learn more about the history of speakers!


    Help support my channel by becoming a patron!


    Get social!

    [/vc_column_text][/vc_tab][vc_tab title=”Parts List” tab_id=”1402713028-2-39afe7-cbb1″][vc_column_text]


    Here’s what you will need for these projects:


    Bone Conducting Headphones

    • Small DC Motor
    • An old pair of headphones

    Cheap Speaker

    • A Paperclip
    • A business card
    • A strong magnet
    • An old pair of headphones

    [/vc_column_text][/vc_tab][vc_tab title=”Further Learning” tab_id=”1402713403419-2-1afe7-cbb1″][vc_column_text]

    Learn more about the history of speakers!

    [/vc_column_text][/vc_tab][/vc_tabs][/vc_column][vc_column width=”1/3″][/vc_column][/vc_row]

  • EMP Tutorial Update


    [vc_row][vc_column width=”2/3″][vc_separator][venera_framed_image content_type=”video” css_animation=”appear” frame_type=”browser” slider_engine=”flexslider” video_link=”https://www.youtube.com/watch?v=ihwQBJGNSV0″ browser_url=”https://www.youtube.com/watch?v=ihwQBJGNSV0″][vc_separator][/vc_column][vc_column width=”1/3″][/vc_column][/vc_row][vc_row][vc_column width=”2/3″][vc_tabs][vc_tab title=”About This Project” tab_id=”1402713028-1-398858-18b3″][vc_column_text]

    I’ve got some good news and some bad-ish news…


    After some consideration, I’ve decided to do an introductory tutorial to Electromagnetism before showing how to make an EMP. Don’t worry, though, it’s going to be worth the wait!

    [/vc_column_text][/vc_tab][vc_tab title=”Important Links” tab_id=”1402713403419-2-18858-18b3″][vc_column_text]

    [/vc_column_text][/vc_tab][/vc_tabs][/vc_column][vc_column width=”1/3″][/vc_column][/vc_row]

  • Tutorial sneak peak!


    [vc_row][vc_column width=”2/3″][vc_separator][venera_framed_image content_type=”video” css_animation=”appear” frame_type=”browser” slider_engine=”flexslider” video_link=”https://www.youtube.com/watch?v=uA_Sj0_S2Fg” browser_url=”https://www.youtube.com/watch?v=uA_Sj0_S2Fg”][vc_separator][/vc_column][vc_column width=”1/3″][/vc_column][/vc_row][vc_row][vc_column width=”2/3″][vc_tabs][vc_tab title=”About This Project” tab_id=”1402713028-1-39372f-0bb1″][vc_column_text]

    I wanted to en-“light”-en you, my viewers, as to where some of your contributions go to.

    [/vc_column_text][/vc_tab][vc_tab title=”Important Links” tab_id=”1402713403419-2-1372f-0bb1″][vc_column_text]

    Help support my channel: http://www.patreon.com/tinkernut Follow Tinkernut! Google + Facebook Twitter

    [/vc_column_text][/vc_tab][/vc_tabs][/vc_column][vc_column width=”1/3″][/vc_column][/vc_row]

  • Are you scared of an EMP?


    [vc_row][vc_column width=”2/3″][venera_framed_image content_type=”image” images=”6380″ frame_type=”picture” slider_engine=”flexslider” img_size=”640 x 424″ faded_text=”EMP!”][vc_column_text]


    If you are reading this post, the odds are that you probably interact with technology dozens, if not hundreds, of times a day. This post PC world is dependent on technology that most people, not to mention entire societies, cannot function without it. Bank accounts, passwords, memories, and entire identities are now stored online and it’s how we communicate and interact with each other.

    So imagine the crisis that would unfold if all technology was destroyed, if “the cloud” came crashing down and the life that we have put online ceased to exist. That is a scenario for future warfare, and Electronic Magnetic Pulses (EMP’s) are the weapons that could lead that charge. EMP’s are what can instantly turn computers, smartphones, tablets and anything electronic into overpriced bricks.

    What would you do if this terrifying future possibility were to actually happen? How would it affect your daily routine? How would you protect yourself? Those are the questions I ask myself and hopefully soon I’ll show you the answer.

    [/vc_column_text][/vc_column][vc_column width=”1/3″][/vc_column][/vc_row]

  • Beginners Guide To Projection Mapping


    [one_half]

    [/one_half]
    [one_half last=last]

    [slogan h1=”Tinkernut Labs” h3=”Basic overview of what we will be doing”][/slogan]

    This video will show you how the basics of projection mapping and how to do it on the cheap!

    [/one_half]
    [clear]


    [slogan h3=”Parts and Downloads”][/slogan]

    You’ll need a projector, so here are a few options:

    [ox_list type=”ox_list_animated”]

    [/ox_list]

    TOTAL COST: ~$60.00 or less


    [slogan h3=”Important Links”][/slogan]

    Installing and Configuring VPT7

    1. VPT7
    2. Beginners Guide Tutorial

    Projection Mapping Examples:
    Pomplamoose “Happy Get Lucky”

    LG Electronics Building Projection

    Audi A1 Car Projection

    [slogan h3=”Support”][/slogan]

    [ox_list type=”ox_list_simple”]

    [/ox_list]

    [social_link style=”stamp” type=”twitter_account” url=”http://www.twitter.com/tinkernut” target=”on” ]
    [social_link style=”stamp” type=”facebook_account” url=”http://www.facebook.com/tinkernut” target=”on” ]
    [social_link style=”stamp” type=”paypal_account” url=”https://www.paypal.com/cgi-bin/webscr?cmd=_s-xclick&hosted_button_id=WBKTMVZGY7XXN” target=”on” ]
    [social_link style=”stamp” type=”youtube_account” url=”http://www.youtube.com/gigafide” target=”on” ]

  • Comments Show: How To Make A Cluster Computer – Part 2


    [tabby title=”Video”]

    This is the comments show for How To Make A Raspberry Pi Cluster Computer (Part 2). You can watch the original video here.


    [tabby title=”Useful Links”]

    How To Make a Windows Cluster:
    http://goo.gl/lp6fel

    Windows CE on the Raspberry Pi:
    http://goo.gl/ze2GKY

    Help support my channel:
    http://www.patreon.com/tinkernut

    Follow Tinkernut!
    Google +
    Facebook
    Twitter
    [tabbyending]

  • Make Your Own Cluster Computer (Part 2)


    [vc_row][vc_column width=”2/3″][vc_separator][venera_framed_image content_type=”video” css_animation=”appear” frame_type=”browser” slider_engine=”flexslider” video_link=”https://www.youtube.com/watch?v=lHmFRlETTcQ” browser_url=”https://www.youtube.com/watch?v=lHmFRlETTcQ”][vc_separator][/vc_column][vc_column width=”1/3″][/vc_column][/vc_row][vc_row][vc_column width=”2/3″][vc_tabs][vc_tab title=”About This Project” tab_id=”1402713028-1-39e9a4-2f88″][vc_column_text]

    65_cluster_comp2_thThis is part two of the series that shows you how to make a cluster computer using Raspberry Pi’s!

    You can watch Part 1 here.

    [/vc_column_text][/vc_tab][vc_tab title=”Parts and Downloads” tab_id=”1402713028-2-39e9a4-2f88″][vc_column_text]

    Acquiring the Parts
    Here’s what you will need:

    1. 2 or more Raspberry Pi’s
    2. SD cards for each Pi
    3. Power Cables for each Pi
    4. Powered USB Hub (optional)
    5. Networking Cables
    6. A Hub or a Router

    TOTAL COST: ~$100.00

    [/vc_column_text][/vc_tab][vc_tab title=”Code” tab_id=”1402753910272-3-8″][vc_column_text]

    Installing and Configuring Raspbian

    • Follow the software configuration steps shown in this video and burn the image file to an SD card for each computer in your cluster.
    • For each Raspberry Pi in your cluster, insert an imaged SD card, connect them all to the same router or switch, and then connect a power source to each one.

    [tabby title=”Terminal Commands”]

      • Install nmap
        • Sudo apt-get update
        • Sudo apt-get install nmap
      • Get current IP
        • Ifconfig
      • Scan subnet for Pi’s
        • Sudo nmap -sn 192.168.1.*
      • Run test file
        • Mpiexec -n 1 hostname
      • Make test folder and file
        • Mkdir mpi_test
        • Cd mpi_test
        • Nano machinefile
          • 192.168.1.2
          • 192.168.1.3
          • 192.168.1.4
          • 192.168.1.5
        • Mpiexec -f machinefile -n 4 hostname
      • Add keys to all pi’s
        • PI01
          • Ssh-keygen
          • Cd ~
          • Cd .ssh
          • Cp id_rsa.pub pi01
          • Ssh pi@192.168.1.3
        • PI02
          • Ssh-keygen
          • Cd .ssh
          • Cp id_rsa.pub pi02
          • Scp 192.168.1.2:/home/pi/.ssh/pi01 .
          • Cat pi01 >> authorized_keys
          • Exit
        • PI03 (ssh pi@192.168.1.5)
          • Ssh-keygen
          • Cd .ssh
          • Cp id_rsa.pub pi03
          • Scp 192.168.1.2:/home/pi/.ssh/pi01 .
          • Cat pi01 >> authorized_keys
          • Exit
        • PI04
          • Ssh-keygen
          • Cd .ssh
          • Cp id_rsa.pub pi04
          • Scp 192.168.1.2:/home/pi/.ssh/pi01 .
          • Cat pi01 >> authorized_keys
          • Exit
        • PI01
          • Scp 192.168.1.3:/home/pi/.ssh/pi02
          • Cat pi02 >> authorized_keys
      • Run new machinefile
        • Cd ~
        • Nano machinefile
          • 192.168.1.2
        • Mpiexec -f machinefile -n 4 hostname
      • Run Python file
        • mpiexec -n 5 python demo/helloworld.py
        • Mpiexec -f machinefile -n 5 python /home/pi/build/mpi4py/demo/md5_dict_attack.py
      • Download and unzip file
      • Copy to all computers
        • Scp -r python_test 192.168.1.3:/home/pi
        • Mpiexec -f machinefile -n 5 python python_test/md5_attack.py

    [/vc_column_text][/vc_tab][vc_tab title=”Important Links” tab_id=”1402753981900-3-10″][vc_column_text]

    Help support my channel:

    http://www.patreon.com/tinkernut

    Follow Tinkernut!

    Google +

    Facebook

    Twitter

    [/vc_column_text][/vc_tab][/vc_tabs][/vc_column][vc_column width=”1/3″][/vc_column][/vc_row]

  • Comments Show: Make Your Own Cluster Computer – Part 1


    [tabby title=”Video”]

    This is the comments show for How To Make A Raspberry Pi Cluster Computer (Part 2). You can watch the original video here.


    [tabby title=”Useful Links”]

    RPI x86 emulator – http://rpix86.patrickaalto.com/
    Minecraft Pi Edition – http://pi.minecraft.net/
    MPI Java Interpreter – http://aspen.ucs.indiana.edu/pss/HPJava/mpiJava.html

    Help support my channel:
    http://www.patreon.com/tinkernut

    Follow Tinkernut!
    Google +
    Facebook
    Twitter
    [tabbyending]